Installing Your Smart Smoke Detector
Smart Smoke Detector Install Guide PDF
Installation Parts
- Smart Smoke Detector
- Mounting Screws
- 2 CR123A Batteries
Tool Required
- Screwdriver
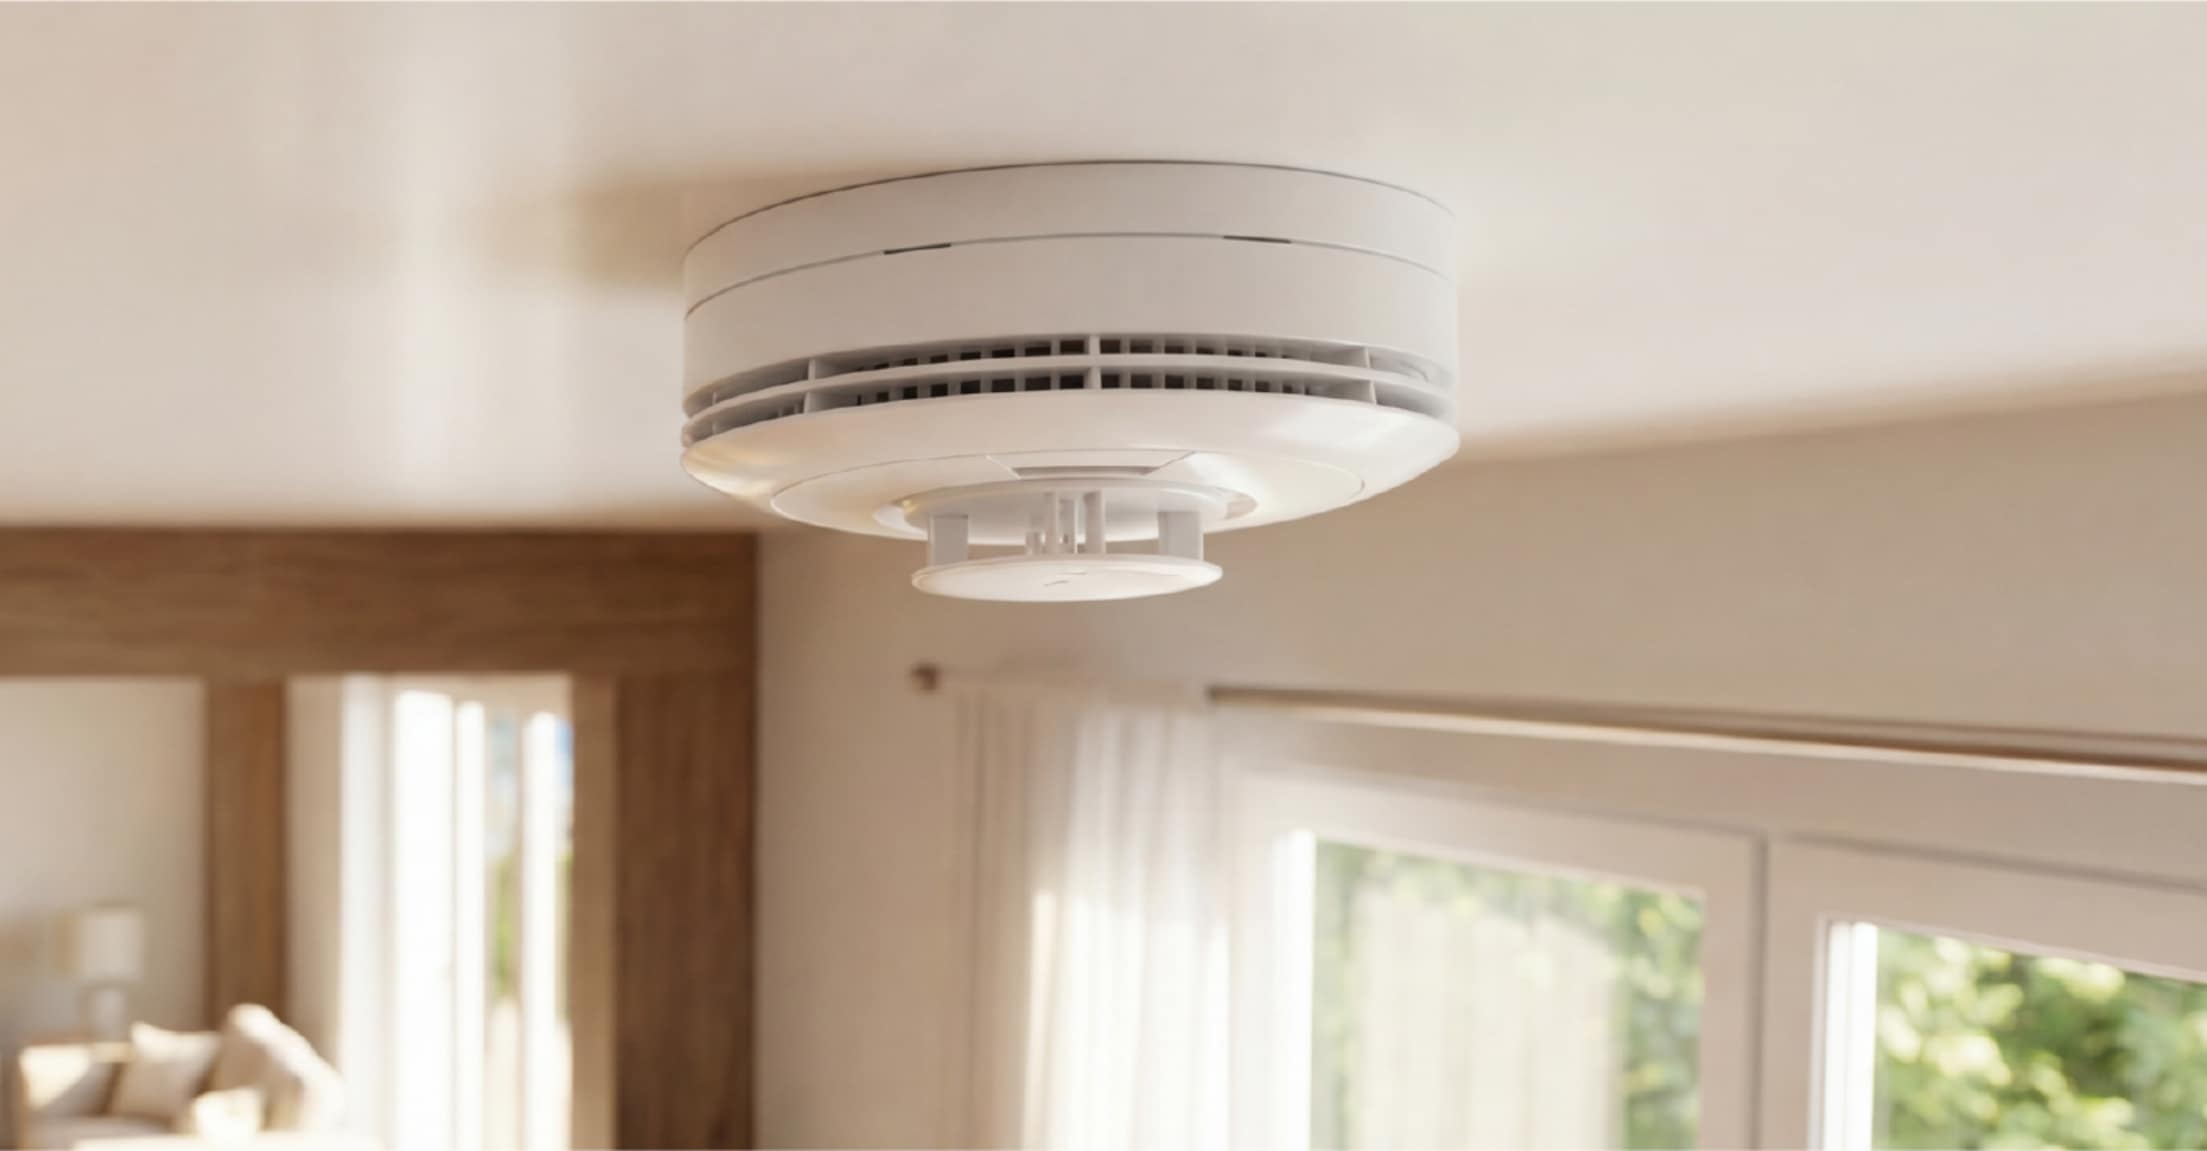
Choosing a location
Your smoke detector is designed to pick up concentrations of smoke or high levels of heat, therefore making location a key component.
The detectors are considered “life safety” devices and do well near any bedroom or in hallways with multiple bedrooms. Also, the detectors can be placed in family rooms or living rooms, depending on your preference and size of your residence.
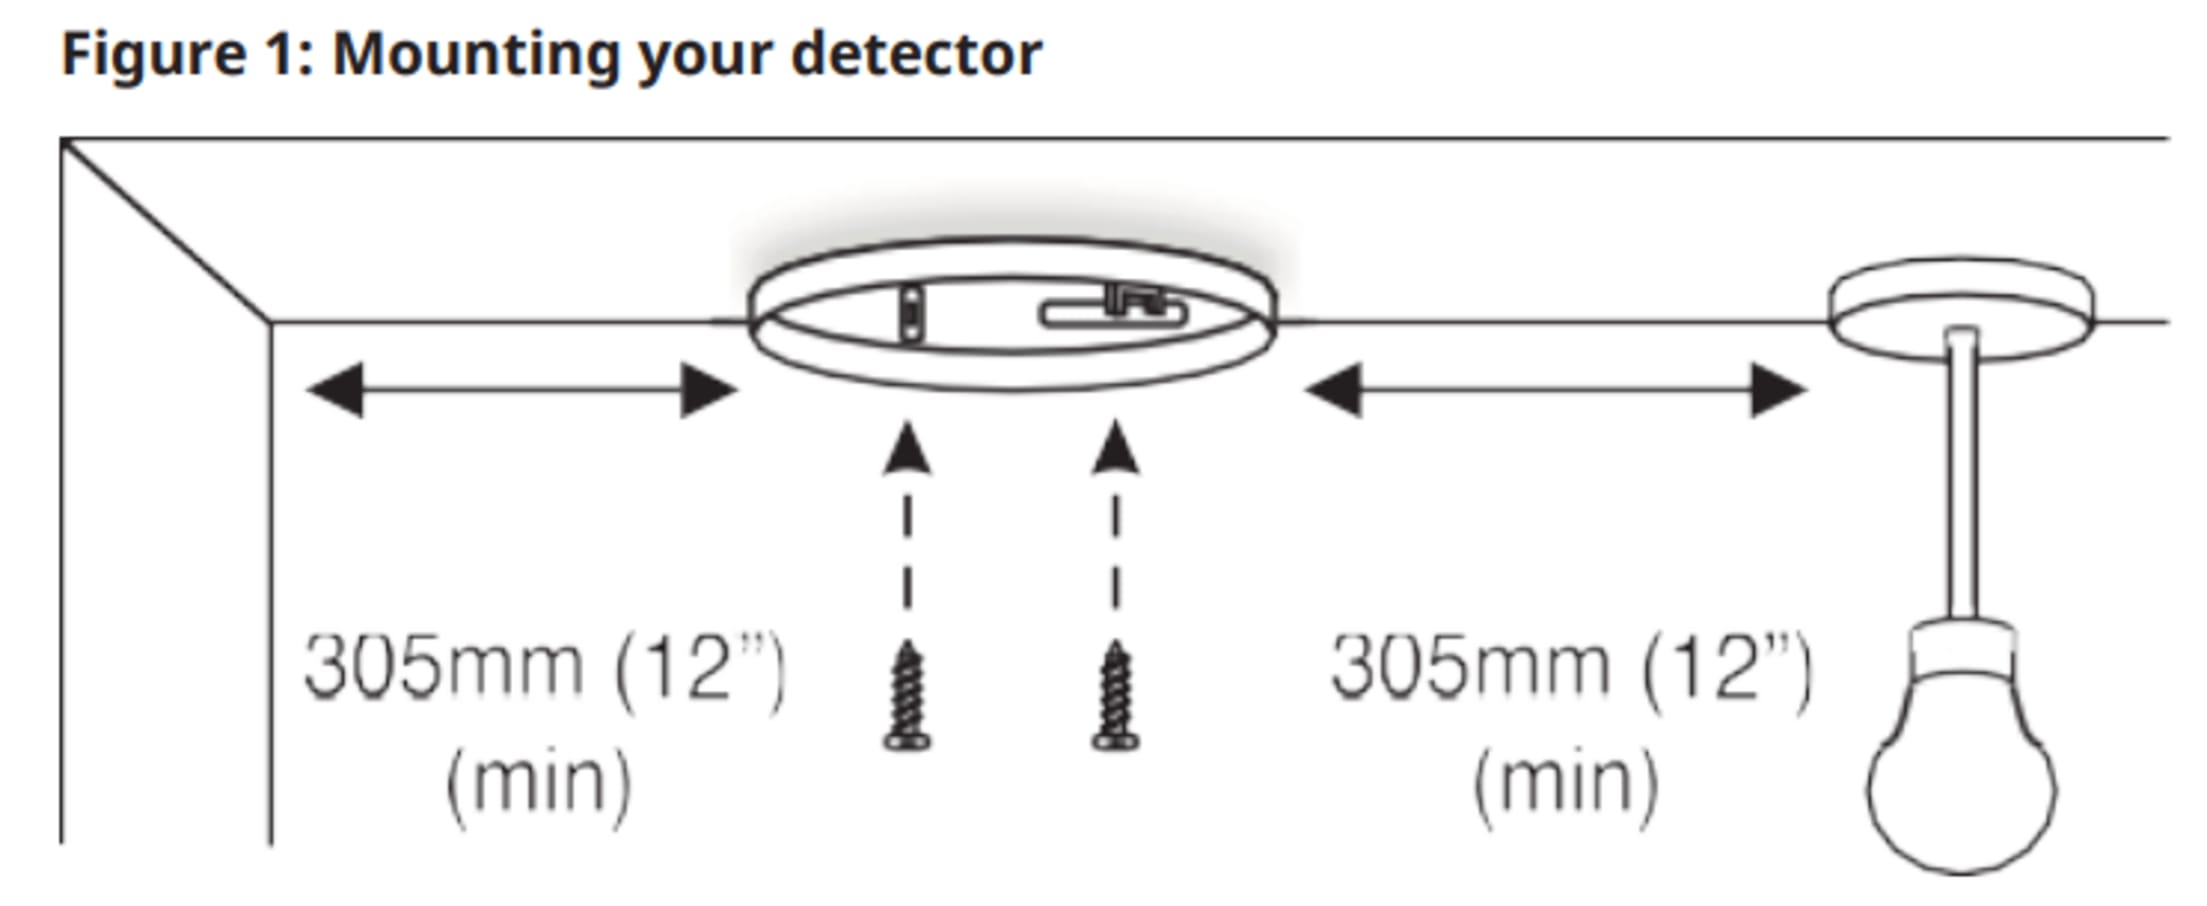
Detectors can be mounted on ceilings or walls. The location should be 12 inches from a wall in either direction.
Avoid placing your detector in
- Ceilings that are peaked or gabled as they may prevent the detection of smoke.
- Hot or humid areas, like the kitchen or near a fireplace, as they may send false alarms.
- Areas with strong airflow, such as near outer doors, windows, or fans, which may prevent smoke from being detected.
Installation Instructions
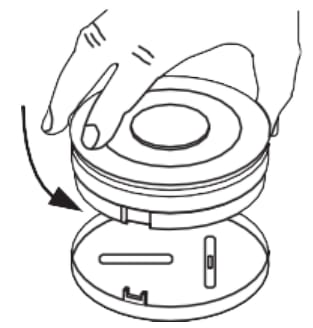
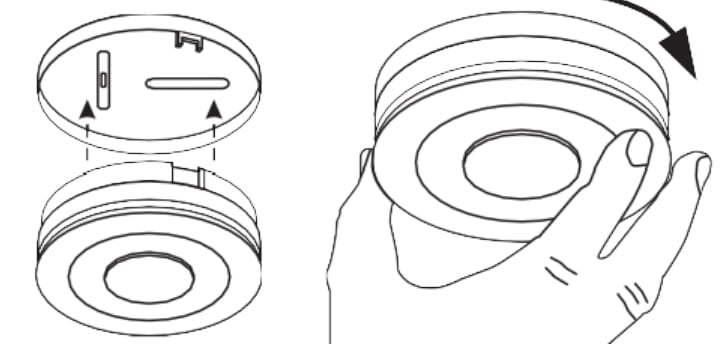
1. Disconnect the detector from its base by simply twisting the detector counter-clockwise.
2. Use the two screws provided to attach the backplate to the desired location.
3. Remove the pull tab to connect the batteries provided in the smoke detector.

4. Twist the detector onto the back plate. Keep in mind there are markers provided on the base and detector to assist with alignment.
Testing the smoke detector
1. Insert the battery to complete a smoke detector test.
2. Wait 2 minutes, after inserting the battery, before you test. The detector enters into local diagnostic test mode for 15 minutes.
3. Follow recommendations to perform the periodic test and use the User code (User Diagnostic Mode) to test.
4. Press the Test/Hush button, while in diagnostic mode, indicated by a red radio LED blinking in one-second intervals, to start a device self-test. To simulate an alarm, press Test/Hush for seven seconds; this will simulate an alarm transmission to the control panel.
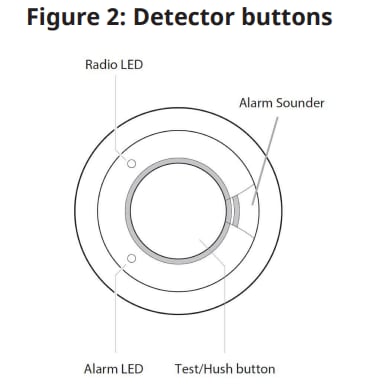
5. The detector performs a link quality test, followed by the radio LED blinking three times. Table 3 shows the Radio LED indication and signal strength:

Troubleshooting
The detector does not sound when you press Test/Hush:
1. Check how old the detector is. See the “Replace by” label on the side of the detector.
2. If necessary, replace the battery or batteries with Panasonic CR123A batteries.
Detector alarms for no apparent reason:
1. If you enroll your detector and the interconnect feature is enabled, refer to your control panel to detect which device is causing the alarm.
2. Check for fumes or steam from the kitchen or bathroom. Paint and other fumes can trigger nuisance alerts.
3. Check for any sign of contamination, such as cobwebs or dust. See Cleaning your detector.
4. Press Test/Hush on the smoke detector causing the alarm. You can identify the detector in question by the alarm LED flashing rapidly. This silences the smoke detector and all other interconnected detectors in the system for 10 minutes.
Radio red LED blinks persistently:
The radio red LED blinks persistently to indicate a connection issue between the radio and the detector head.
1. Power off: Remove the batteries to turn off the detector.
2. Reconnect: Carefully detach the radio unit from the detector head. Then, securely reconnect them.
3. Power on: Reinsert the batteries to power the detector back on.
Drift compensation
If the detector is indicating Contaminated Chamber with a yellow LED flashing four times every 48 seconds, the detector is no longer within the marked sensitivity. If the detector is indicating Normal/Standby with no flash and no beep, it is within the marked sensitivity range.
Note: If the panel still displays the Contaminated Chamber message after cleaning, call the installer or dealer for service.
Replacing batteries
When the device battery power is low and replacement is necessary, the smoke detector beeps, and the yellow light flashes at the same time once every 48 seconds for at least 30 days. Replace the battery, ensuring the orientation is correct, as soon as possible.
When you replace the battery, ensure the orientation is correct, then press Test/Hush to check that the detector is functioning correctly.
Note: Replace the battery if the detector does not sound when you press Test/Hush.
Installing additional security devices?
Click on the icon of your chosen device(s) below.Otherwise, go on to configuring your panel settings.
Other Device Install Guides
Your Lamp Plug lets you turn a lamp on and off, or dim it (if the lamp has a dimming bulb), using your control panel or mobile app. It plugs into any standard outlet.
We offer basic and smart home security systems with professional monitoring for as low as $19.99/month. Keep your home safe and get your free quote today.
Your Stream Video Recorder enables you to have 24/7 video storage from the cameras included in your security system. You can connect up to 8 video cameras to record continuously, and view your video recordings from your mobile app, or locally from a TV or computer monitor.
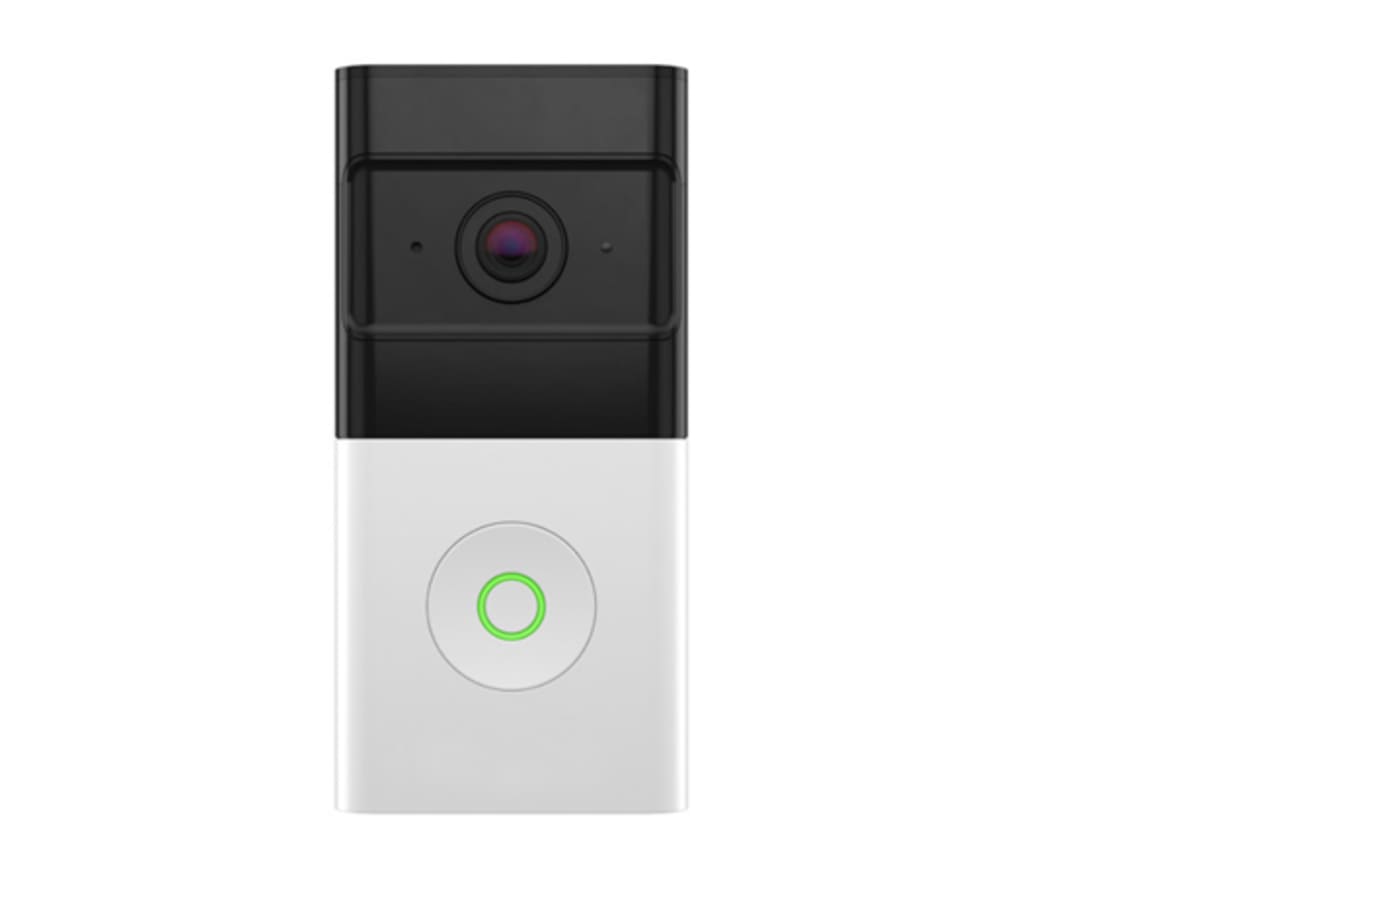
This completely wireless video doorbell gives you the flexibility to choose the perfect installation location at your front door.
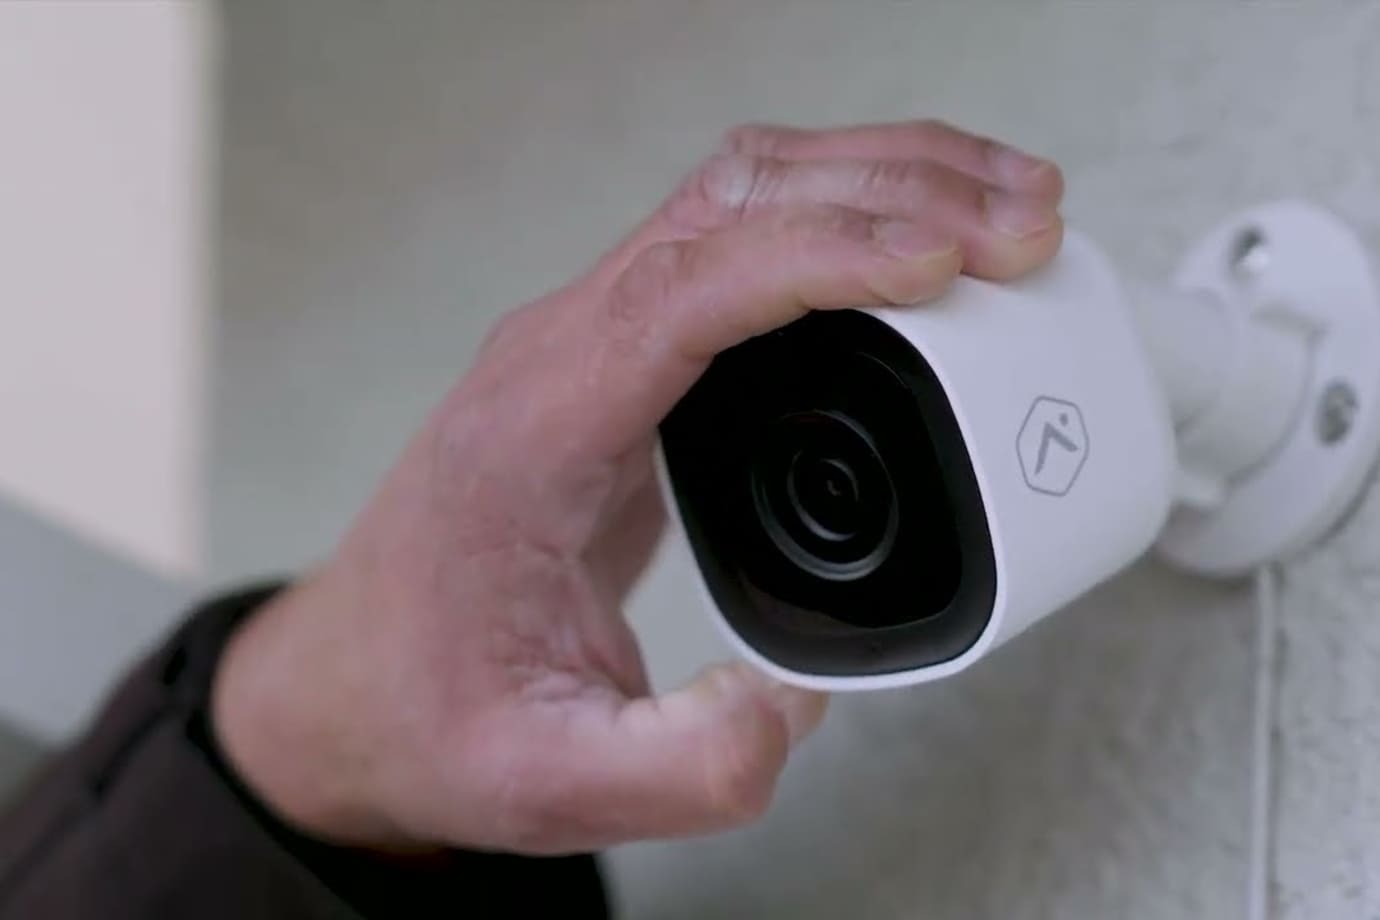
With our most advanced outdoor camera yet, the Premium Outdoor Camera provides 24/7 recording capabilities, enhanced night vision, proactive deterrence by automatically emitting loud noises if an unwanted visitor is on your property, access to two-way audio, and intelligent video analytics.